Installing a thermal pad on an M.2 SSD helps create proper thermal contact between the drive and its heatsink or cooling cover. The key is not simply placing a pad on the SSD—the pad needs to contact both surfaces without being so thick that it prevents the heatsink from fitting correctly.
The following steps explain how to install an M.2 SSD thermal pad with a typical two-piece SSD heatsink. If your motherboard uses a different M.2 shield or cooling design, follow the mounting arrangement specified for that hardware.
Before installing an M.2 SSD thermal pad, first check the cooling design you are using. Some motherboard M.2 shields use a thermal pad only on the top side of the SSD, while two-piece aftermarket heatsinks may use pads above and below the drive.
If your SSD already has an integrated heatsink, do not automatically add another motherboard heatsink or stack additional thermal pads on top. Make sure the SSD can sit flat in the M.2 slot and follow the cooling hardware manufacturer's installation design.
Also check the thermal pad thickness before assembly. The pad should make full contact with the SSD and heatsink without preventing the heatsink from closing or putting excessive pressure on the SSD PCB.
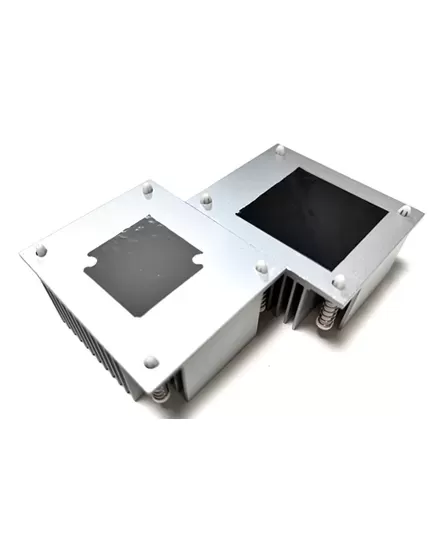
The heat sink uses thermal pads to dissipate heat from either side of the blade SSD, the thermal pads may come with plastic liners on each side, so make sure all are removed before use, use a pair of tweezers to peel one side of protective film away from one of the thermal pads.
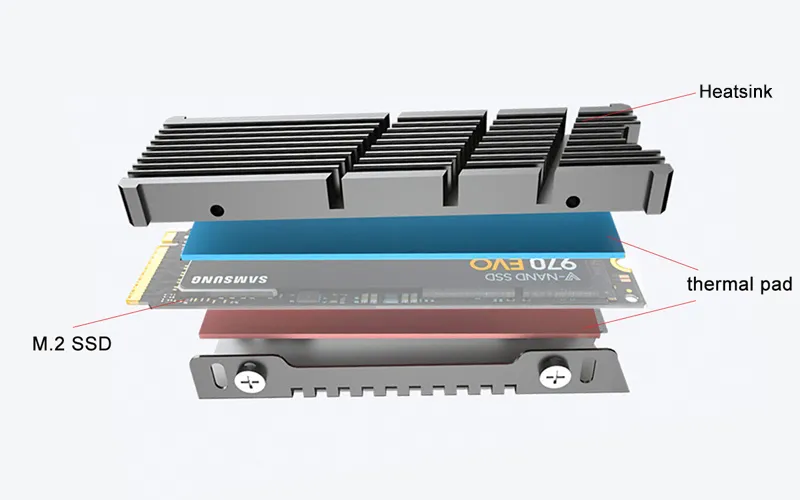
Align the exposed side of the thermal interface pad with the bottom tray section of the heat sink assembly, lay the thermal pad down so it covers the tray evenly, use your finger to lightly press down on the thermal pad to adhere it to the surface.
Use a pair of tweezers to peel one side of protective film away from the remaining thermal pad.
Align the exposed side of the thermal pad with the top section of the heat sink, lay the thermal pad down so it covers the top section evenly, use your finger to lightly press down on the thermal pad to adhere it to the surface.
Use a pair of tweezers to remove the plastic liner from the thermal pad in the tray, the thermal pad might lift up from the tray as the liner is removed—this is normal, use your finger to keep the pad in the tray.
Place the M.2 SSD into the heatsink tray according to the heatsink design. Keep the gold connector and mounting notch completely clear, and make sure the SSD is centered over the thermal pad. The SSD should sit naturally in position without being forced or noticeably bent. If it does not sit flat, stop and check the thermal pad thickness and heatsink alignment before continuing.
Remove the remaining protective liner from the upper thermal pad before closing the heatsink. This step is easy to miss, but leaving the plastic film in place prevents proper thermal contact between the SSD and thermal pad.
Align the upper heatsink section with the SSD and bottom tray, then close the heatsink evenly according to its mounting design. You should feel some resistance as the thermal pads compress, but the heatsink should not require excessive force to close. If it cannot be assembled normally, do not force it. Check whether the thermal pads are too thick or incorrectly positioned.
Before installing the SSD into the motherboard, check that the heatsink is centered and that the gold connector and mounting notch remain unobstructed.
The SSD should remain flat inside the heatsink, without visible PCB bending. The thermal pads should make contact with the intended surfaces without pushing the heatsink out of alignment.
If the assembly looks uneven or the heatsink will not close normally, reopen it and check the pad thickness and position rather than applying more force.
No. A thermal pad is useful when it creates proper contact between an M.2 SSD and a heatsink, motherboard shield, or another cooling surface.
If your motherboard already provides an M.2 heatsink with a thermal pad, use that cooling system as designed. If your SSD has a pre-installed heatsink, check compatibility before adding another cooling cover.
For a more detailed explanation, see Do M.2 NVMe SSDs Need a Thermal Pad?
Installing an SSD thermal pad correctly comes down to three things: the pad must match the available gap, both protective liners must be removed, and the heatsink must close with even contact without bending or stressing the SSD.
If the heatsink does not sit flat after installation, do not solve the problem by applying more pressure. Recheck the thermal pad thickness, position, and cooling hardware before installing the SSD in the motherboard.
To learn more about AOK's high-performance thermal interface materials and thermal management solutions, please contact our team for professional product recommendations and application support.

 +86 755 2976 5899

 English