About CPU Thermal Pads:Everything You Need to Know!
- Posted on:2022-11-11 14:17:00
- Source:AOK Thermal Pad Manufacturer FAQs
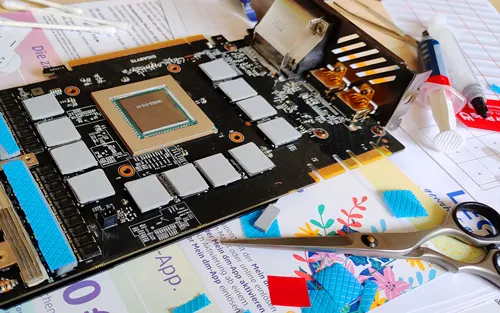
You have heard the word thermal pad as a source of heat transfer within the CPU, but you know where exactly it works? A CPU thermal pad, usually known as an alternative to thermal paste, is used to help your PC run cool.
Computer parts produce heat when they works. The heat increases when you load heavy applications and games. A heated PC may result in frequent shutdowns and permanent damage unless you find a reliable solution to help dissipate heat.
The reliable solution is a good thermal interface material – a thermal pad. Let’s check out how it works as a good heat transfer within the CPU and how we can use it.
What is a CPU thermal pad?
A CPU thermal pad, also known as a thermally conductive pad or thermal interface pad, is a thermally conductive sheet placed between the CPU parts to help dissipate heat.
CPU parts may look even but have microscopic imperfections which trap air. When you place a thermal pad within those surfaces, it softens and goes into the air gaps, eliminating air and boosting heat transfer.
You need to know that thermal pad are electrically insulative pre-formed rectangles usually manufactured with silicone or paraffin wax.
What is the use of thermal pad? although the heat transfer they offer may not be as good as CPU grease, applications like RAM and VGA cards require thermal pad only.
A thermal pad helps transfer heat within the CPU. There are many other thermal interface materials such as liquid metal, electrically conductive thermal paste, electrically insulative thermal paste, and gap fillers that act as an alternative to thermal pad.
However, you need to note that thermal pad will be best suited to RAM chips. If you need a thermal interface material to put on an integrated heat circuit, we recommend using a thermal paste.
A thermal pad has many advantages over other thermal interface materials. Applying it instead of any liquid or semi-liquid interface material is less messy and won’t leak to the surroundings.
Note: if a thermal paste leaks to the CPU pins and motherboard surroundings, it can cause a short circuit or other permanent damage to the CPU.
Another advantage is that it won’t stain your hands, unlike thermal pastes, which need to be removed with alcohol if it stains the skin. Along with being super-easy to apply, it won’t attract dust and offers uniform thickness on each corner.
These advantages are not possible if you use liquid metal, gap fillers, or thermal paste. You can easily cut it into pieces of your desired length and use it on the CPU. Hence, you don’t have to worry about the quantity while applying too. It lasts around 5+ years within the CPU.
Where there are numerous advantages of thermal pad, there are disadvantages too. Thermal pad are comparatively expensive and may not work as well as other thermal interface materials.
How to use a thermal pad?
Using a thermal pad is easy, unlike other thermal interface materials with a risk of leakage and short circuits. Applying it is a clean and hassle-free process. Here is a step-by-step guide on how to use a thermal pad:
1. Keep the contact surface between the electronic components and the thermal pad clean and clean, and avoid the presence of dirt on the surface of the electronic components. Any stain on the contact surface will cause the self-adhesion of the thermal pad and the thermal conductivity of the seal to deteriorate.
2. When picking up the thermal pad, the one with a large area should be picked up from the middle, because if the large thermal pad is picked up from the edge, it is easy to be unevenly stressed, resulting in deformation of the thermal pad, affecting subsequent operations and even causing damage. Damage the silicone sheet. Sheets with smaller areas are not required.
3. Holding the thermal pad with the left hand, tear off one of the protective films with the right hand. When using, remember not to tear off both protective films at the same time, and minimize the number and area of direct contact with the thermal pad, so as to keep the self-adhesion and thermal conductivity of the thermal pad from being damaged.
4. After tearing off the protective film, first align the radiator towards the electronic components to be pasted, slowly lower the thermal pad, and use a flat film to push from left to right to avoid the generation of air bubbles in the middle.
5. If bubbles are generated during the operation, you can pull up one end of the thermal pad and repeat the above steps, or use a hard plastic sheet to gently wipe off the bubbles. The force should not be too large to avoid damage to the thermal pad.
6. Tear off the other protective film, and then put it into the radiator in alignment. When tearing the protective film, the force should be small to avoid strain or cause air bubbles.
7. After the thermal pad is attached, apply a certain pressure to the radiator and store it for a period of time to ensure that the thermal pad is fixed.
If you would like to learn more about AOK performance thermal materials, please visit our website at www.aok-technologies.com.


