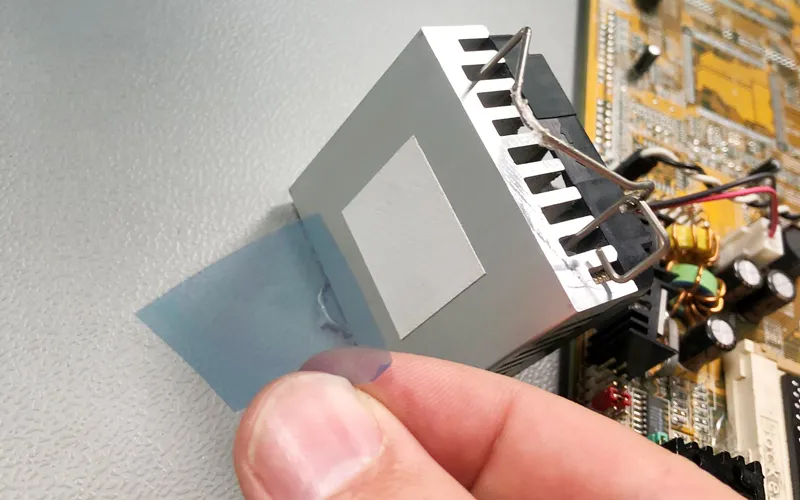
How Do You Apply Thermal Relief Pads?
- Posted on:2023-10-16 10:31:00
- Source:AOK Thermal Pad Manufacturer FAQs
Here are the basic steps to apply a thermal relief pad:
1. Clean the surfaces - Make sure the surfaces where the pad will be applied are clean, dry and free of debris. This ensures best adhesion.
2. Cut the pad to size - Measure and carefully cut the thermal pad to fit the desired area. Typical areas are under CPUs, GPUs, voltage regulators, etc. Avoid overhangs.
3. Peel off backing - Thermal pads come with a protective backing that needs to be peeled off, exposing the adhesive side. Remove just before applying.
4. Apply adhesive side down - Carefully place the thermal pad onto the surface, adhesive side down. Apply light pressure to smooth it out and ensure full contact.
5. Apply heat sink/component - Place the heat generating component (e.g. CPU) or heat sink directly onto the exposed side of the thermal pad.
6. Apply mounting pressure - Screw down or clamp the heat sink/component with the required mounting pressure per manufacturer specs.
7. Check for air bubbles - Inspect for any air bubbles trapped between surfaces. Squeeze out gently if needed.
8. Allow curing time - Some thermal pads require curing time before full operation. Check datasheet for recommendations.
9. Reinstall case/covers - Replace any case panels or covers after ensuring proper pad placement and mounting pressure.
Proper surface prep and applying even pressure during installation are key for optimal thermal transfer. It's important to note that the precise application process may vary depending on the specific product and thermal pad manufacturer's instructions. Always refer to the product datasheet or guidelines provided by the manufacturer for the best results and to ensure proper application of the thermal relief pads.
If you would like to learn more about AOK performance thermal materials, please visit our website at www.aok-technologies.com


